PLEASE CALL THE EIT HELPDESK AT 335-3819 IF YOU HAVE QUESTIONS.
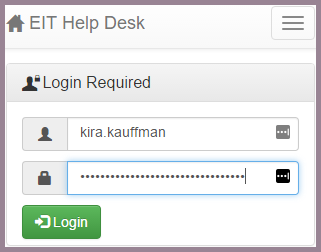
Login to the EIT Help Desk
Navigate to https://help.em.wsu.edu in your browser.

Enter your WSU Network ID and Password, and then click Login.
Viewing Information on the Dashboard

- Click
 to open a new ticket with the EIT Help Desk. Click
  to view the Personal and Departmental Statistics window.
 - Clicking Logout will securely close your Help Desk ticketing session.
- Filter Action Buttons:
- Clear – Pressing Clear will remove all the filters you have in place on your Open Requests and will display all of your Requests.
- Save – Clicking Save will keep your Filter settings for future use. A window will pop up with a field for you to enter a name for the new Saved Filter you have just created. You can access Saved Filters by clicking Saved Filters at the end of the Action Button row.
- Show Filters – Click Show Filters to view all the filtering options. Click it once more to hide your filtering settings.
- Refresh – Click Refresh to update the data on the page and show changes to your Open Requests.
- Export – Clicking Export will open a new tab and bring up a Save As window where you can choose to save an Excel sheet with your filtered results. It will contain the Request ID, Ticket Number, Title, Status, Priority, Category, Reported By, Affected User, Department, Created, Modified, Resolved, Resolution, Resolution, Escalated, and Minutes fields.
- View – Clicking View
- Details – Toggling Details on by clicking it once will display the comments for each request. Clicking Details once more will hide the comments.
- Saved Filters – Create your own set of Filters, and label them for future use.
- All the tickets you can see or have filtered.
- Click the Incident Response button
 to view a ticket.
 - Click
 to keep an eye on a ticket.
- Click the Incident Response button
- Select from this menu to view 5 to 100 tickets at a time.
 Sort Urgent by ascending or descending.
Submitting a New Request
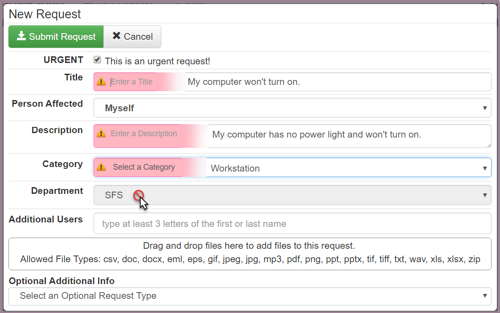
Marking a New Request as URGENT designates to the ticketing system that this issue is urgent to you. Once the ticket is assigned to an Agent, they will update the Incident Status to Urgent, Standard, On Hold, or Project depending on their communication with you upon receiving the Request.
Requests that are marked as URGENT require immediate action and will be prioritized by EIT staff. Only items that need immediate action or are mission critical should be marked as URGENT.
You must fill in the Title, Description, and Category fields to submit a New Request. If you are the Person Affected, you will not be able to change the corresponding Department field, as it will always pull your current Department that’s listed in Active Directory.
You will get an email notification for your Incidents every time an Incident is opened, closed, reopened, a comment is made, or a file is added.
Searching for Projects and Incidents
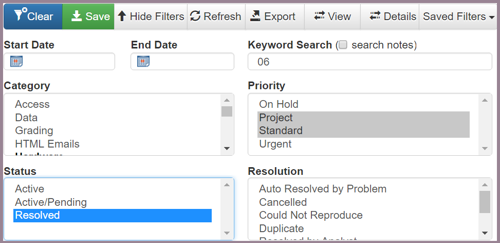
Enter the Start and/or End date of the Incident or Project if you know it. Hide Filters, Refresh, Export, View, Details, and Saved Filters buttons.
- Hide/Show Filters – Click Show Filters to view all the filtering options. Click it once more to hide your filtering settings.
- Refresh – Click Refresh to update the data on the page and show changes to your Open Requests.
- Export – Clicking Export will open a new tab and bring up a “Save As” window where you can choose to save an Excel sheet with your filtered results. It will contain: Request ID, Ticket Number, Title, Status, Priority, Category, Reported By, Affected User, Department, Created, Modified, Resolved, Resolution, Resolution, Escalated, and Minutes fields.
- View – Clicking View will display tickets and ticket details vertically or horizontally.
- Details – Toggling Details on by clicking it once will display the comments for each request. Clicking Details once more will hide the comments.
- Saved Filters – Create your own set of Filters, and label them for future use
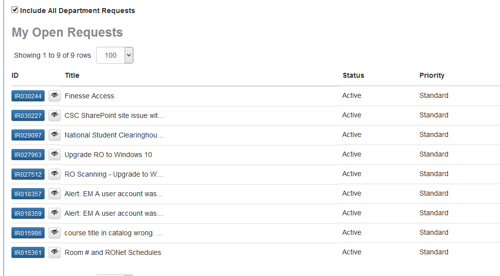
If your account has been given the appropriate permission, you will see a checkbox labeled "include all department requests".
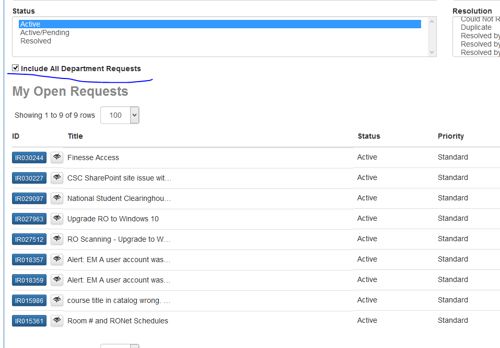
When checked, you will be able to view all requests for your department.
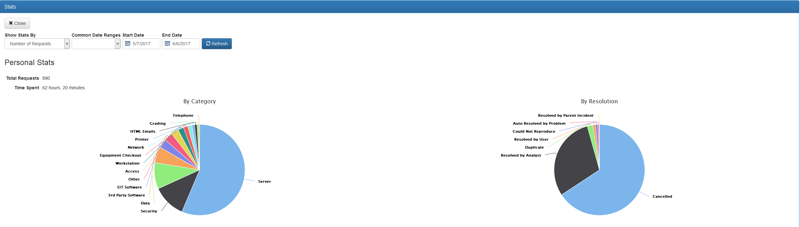
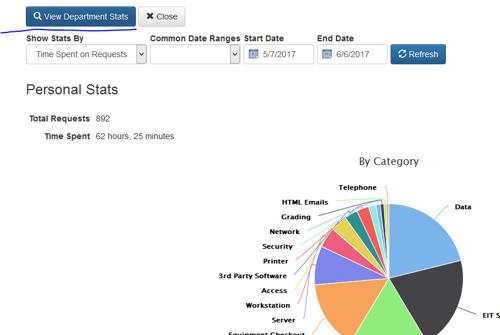
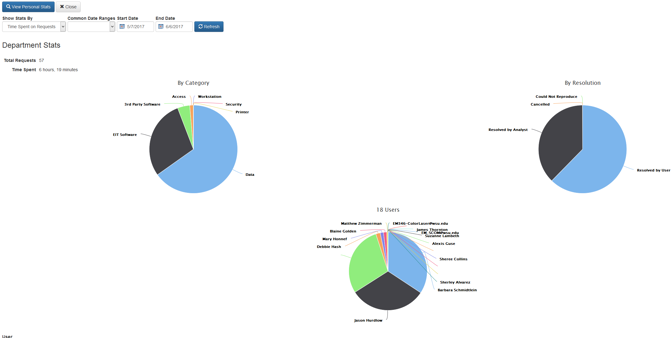
Viewing Your Statistics
Click the stats button at the top of the interface to view all personal stats. You can filter these stats by number of requests and time spent on requests.
If your account has been granted the appropriate permissions, you will see the options to toggle between all stats for your department, personal stats, and stats for all requests for any department.
- View Department Stats – Click the View Department Stats tab to view requests for your department.
- View Personal Stats – Click the View Personal Stats tab to view your own requests.
- Stats for All Requests for Any Department – Click this tab to view all requests for any of the departments.
Toggle Location
Department Stats View
Statistics for all Requests for any Department View
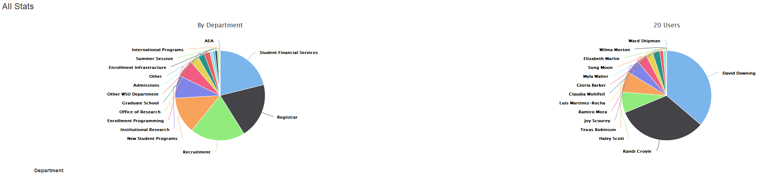
Department List Under View All Stats
***Press Ctrl F5 to force refresh the page in case the page says Loading… for longer than 30 seconds.
PLEASE CALL THE EIT HELPDESK AT 335-3819 IF YOU HAVE QUESTIONS.